

How to create random tables and generators in Role Generator?
First Steps:
After the last update of the Role Generator platform, it is now available for registered users create your own Random Generators using Tables and Modules. It is also possible for all users (registered or not) to access these modules and test them whenever their creator wishes to share them, choosing between Public or Private visibility. ¡Registration is free!
To create your own modules you will first have to create your own tables. You can also use tables from other users that are available.
- Tables are simple random generators where there is only one theme.
- Modules are generators that combine several tables giving a more complete content.

1. Create Tables
1. To create your tables with your own contents, and to be able to use them later in your modules, you will first have to access "My Tables" and click on "New Table".
2. Once you click on the button a window will open where you can create the table. Each line you make will be a row in the table, to jump from row to row just press Enter. In each table you can put up to 100 lines of text (or 300 lines if you are a Role Player) so in total there will be 100 different possibilities when randomly generated (or 300).


3. You can test these tables by clicking on the yellow die button to see what the results will look like. You can also edit the table to add or change the lines you want.
2. Crear Módulos
1. To create modules you will have to click on “My Modules” and click on "New Module".
2. First you will have to describe what the module is about and what name you want to give it along with the tags and categories.

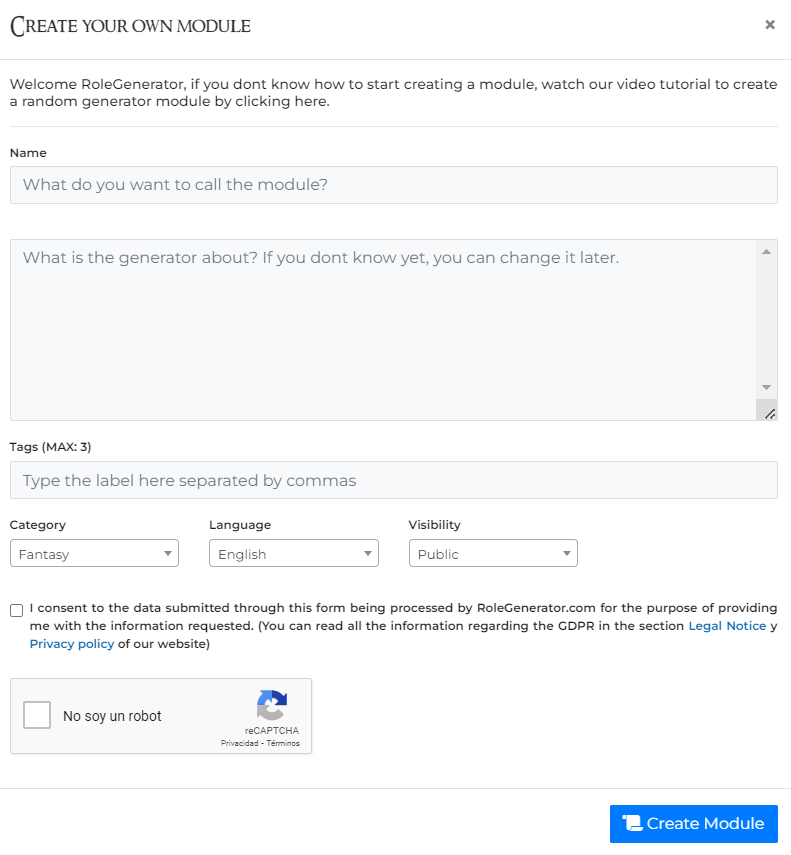
3. Once created click on edit to complete all fields and add tables to the generator.
4. You can search for your own tables or use the ones that are in public mode in the community. By default only the own tables you have created will appear. If you click on the top right button, the public ones will appear instead.

5. You can search both by table ID and by Name. The table IDs appear in the table description after they are created.

6. The ID of the tables appear in the table description once they are created.
7. You can add text before and after adding each table. The width of the fields is used for positioning in the module and formatting. There are two types of fields:
- Small: They do not adapt to the content, so they are for short texts.
- Large: They adapt to the content, ideal for long contents.
8. Once you have filled in all the fields you must choose whether you want it to be public or private. If it is public, other users will be able to use it in their role-playing games, comment the module in the comment box and like it.
3. AI Table Generator (Not available)
For the Role Player (registered users and subscribed to Role Generator) there is the possibility of creating tables using Artificial Intelligence. To use it we will first have to create a table and leave the content blank, then click on Edit and the AI Content Generator will appear on the right.

If you have available Role Points you can make requests to the AI. These requests consume Role Points depending on the amount of information generated. You can request anything that can be listed, choose how many results you want and the language. There is also the possibility to limit the maximum number of Role Points per request to control the amount of information generated.